This tutorial will guide you through the installation of a pre-configured Condres Minimal using the Condres Cli-installer with the current version 1.0.3 of Condres-Cli-Installer This will be updated with further development of the installer.
Condres-Cli-Installer is a CLI net-installer, which means it does not need or provide a (real) graphical interface but uses a console or terminal menu to download all packages for the target system from the internet during installation rather than extracting a compressed ISO image.
Compared to traditional unpack-installation with a graphical installer like Calamares this has some apparent advantages:
- The install media can be very small. In this case the download is less than 1600MB. Also since no video-drivers are needed for the text-only environment it is unlikely that you will run into problems booting the Condres ISO.
- The packages installed to the resulting target will be the latest available on the chosen branch and no matter how old your install media might be, you will not need to update the fresh install.
Like that the Condres ISO will basically never be outdated. Even the installer itself will be updated automatically when you start the launcher..
- Options for customization are basically unlimited. You are free to choose your auto kernel and free drivers and any other packages and you will have many more and very detailed ways of configuring the target install to your liking.
On the other hand, installation with this tool
- requires more time for configuration and download of packages.
- requires some understanding of a Linux system and you will need to make several decisions on your own rather than someone else has made them for you beforehand.
- does not provide a live environment of the resulting deskop. You will see what you get when you get it – WYNSIWYG
So let’s get started!
Connect to the Internet
The installation image enables the dhcpcd daemon for wired network devices on boot. The connection may be verified with ping:
ping codelinsoft.it
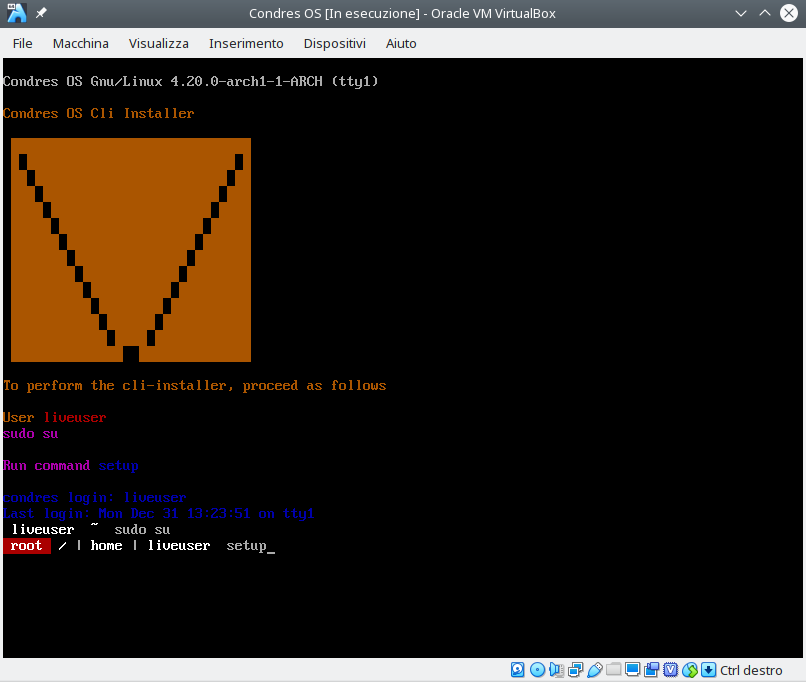
You can login as user liveuser or as root, in both cases using the no password. Then start the launcher by running:
liveuser
sudo su
setup
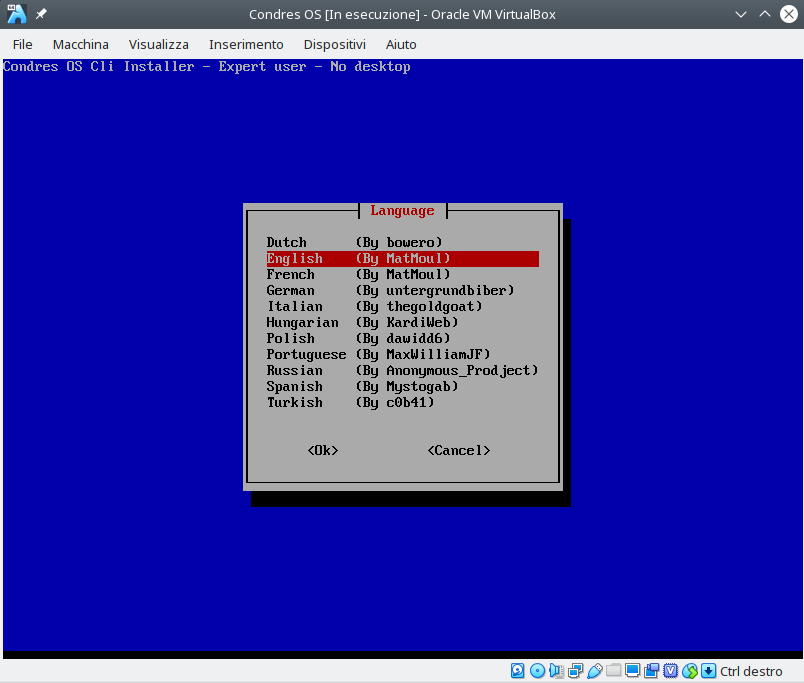
After that you can choose between several languages for the installer. Some translations are not complete, yet, but in theory, these are available at the moment:
“Dutch” “(By bowero)
“English” “(By MatMoul)
“French” “(By MatMoul)
“German” “(By untergrundbiber)
“Italian” “(By thegoldgoat)
“Hungarian” “(By KardiWeb)
“Polish” “(By dawidd6)
“Portuguese” “(By MaxWilliamJF)
“Russian” “(By Anonymous_Prodject)
“Spanish” “(By Mystogab)
“Turkish” “(By c0b41)
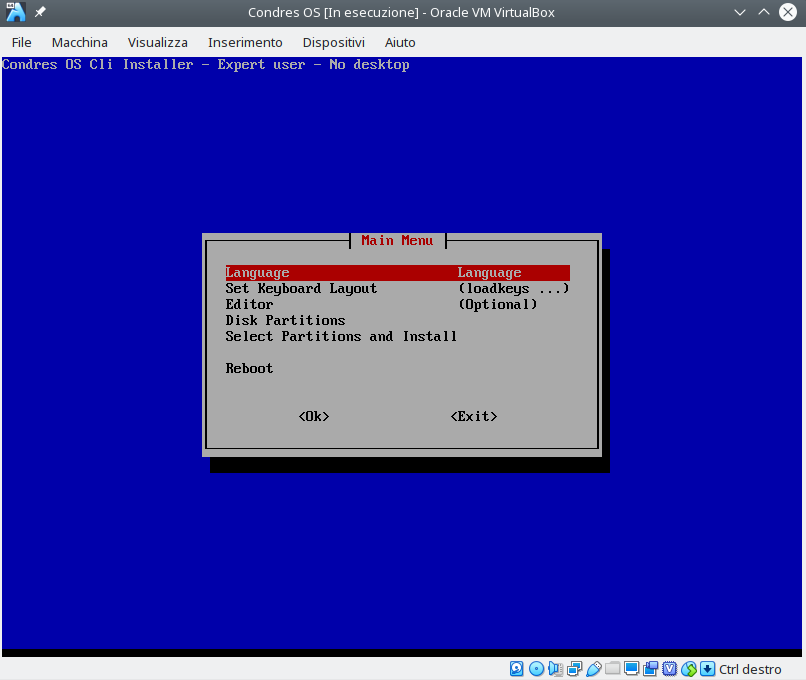
Some more system checks in the background and you will reach the main menu:
Prepare Installation
- Language
- Set Keyboard
- Editor
- Partition Disk
In case you haven’t already prepared the needed partitions for your install in advance, this step offers tools to partition storage devices with a choice of CLI tools (cfdisk, cgdisk, fdisk, gdisk or parted) and you also have an option to automatically partition your selected disk. In that case Condres will create a separate boot partition of 512MB next to a root partition of the remaining disk space for you.
In our example we will choose automatic partitioning to keep it simple. - Mount Partitions
Here you will be asked to specify which partitions to mount and how, starting with /root. We’ll select the bigger one of our partitions that have been auto-created in the preceding step and use filesystem ext4, which is common for a Linux system. On the next screen we are offered a list of different mount options. If you don’t know of any special needs, just leave the default and confirm with [OK], or else choose what you need.
Next step is about SWAP. We haven’t created a separate swap partition but we still have the option to use a swap file. In that case we can specify its size on the next screen. Or just don’t use swap and continue with ‘None’. Or of course you can choose another existing partition here to be mounted as swap by the final install – sharing a swap partition with another system on your computer is also an option of course. Just select it here like any other partition.
A /boot partition (if needed) should be mounted as filesystem vfat.
If you decide to mount more partitions you will be asked to specify their respective mountpoints (/home /opt /var ...).
Back to Main Menu we will now in our case select option 2.
Reboot.
Install desktop on Condres OS Minimal edition
Plasma desktop
$ sudo pacman -S plasma-meta plasma sddm
systemctl enable sddm-plymouth
systemctl start sddm-plymouth
Gnome desktop
$ sudo pacman -S gnome gnome-extra gdm
systemctl enable gdm-plymouth
systemctl start gdm-plymouth
Cinnamon desktop
$ sudo pacman -S cinnamon lightdm lightdm-gtk-greeter
systemctl enable lightdm-plymouth
systemctl start lightdm-plymouth
Mate desktop
$ sudo pacman -S mate mate-extra lightdm lightdm-gtk-greeter
systemctl enable lightdm-plymouth
systemctl start lightdm-plymouth
Xfce4 desktop
$ sudo pacman -S xfce4 xfce4-goodies lightdm lightdm-gtk-greeter
systemctl enable lightdm-plymouth
systemctl start lightdm-plymouth
Warning: Before using login sessions, you must create a standard user because by default the root login account is disabled.
Creating users on Condres OS Minimal edition
Enable sudoers
$ sudo visudoUncomment the wheel group, this allows all users in the wheel group to run all commands.
%wheel ALL=(ALL) ALL
$ useradd -m -G wheel -s --create-home /bin/bash userOneAdd a user for a typical desktop system, eg: user that takes advantage of teh GUI desktop managers. /bin/bash specifies their login shell.
Protect the user account with a password
$ passwd userOneAdding a system user
$ useradd -r -s /usr/bin/nologin user0neChanging user login names
$ usermod -l newname oldnameChanging user’s home dir
$ usermod -d /new/home/dir -m user0neTest if sudo works by entering the command
$ sudo whoamiif you get something like this (below), then sudo is working for the set account.
Installer view video:
View Screenshot:
{gallery}cli_installer{/gallery}